


Certificates
- Certificate
- mabl Skills Certification: Non-functional Testing
- Role
- mabl
- Date
- 2025/11
- Certificate
- mabl Skills Certification: Advanced
- Role
- mabl
- Date
- 2025/11
- Certificate
- mabl Skills Certification: Foundations
- Role
- mabl
- Date
- 2025/10
- Certificate
- GENERAL 2024#2
- Role
- JDLA Deep Learning
- Date
- 2024/03
- Certificate
- Cloud Essentials
- Role
- CompTIA
- Date
- 2019/11
タグ
サイト統計
7
2
11
3,412
0 日
0 日前
916 語
5 分
Oh My PoshでWindows Terminalをカスタマイズする(備忘録)
Oh My Poshとは
Oh My Posh は、Windows、Mac、Linux で使える シェルプロンプトのカスタマイズツール です。PowerShell、Bash、Zsh、Fish などに対応しており、カラフルで見やすいプロンプトを簡単に設定できます。
ディレクトリツリー
%USERPROFILE%├── .config│ ├── powershell│ │ ├── user_profile.ps1│ │ ├── user.omp.jsonC:\├── ドキュメント│ ├── PowerShellMicrosoft.PowerShell_profile.ps11. Microsoft StoreでPowerShellをインストールする
-
Micsoroft Store Appを開く
-
検索バーで
PowerShellと入力する -
PowerShellをクリックし、入手をクリックする
2. Nerd Font をインストールする
-
以下のリポジトリから
Hack.zipをダウンロードするWaiting for api.github.com... -
ダウンロードしたZIPファイルを展開し、
HackNerdFontMono-Regular.ttfをダブルクリックしインストールをクリックする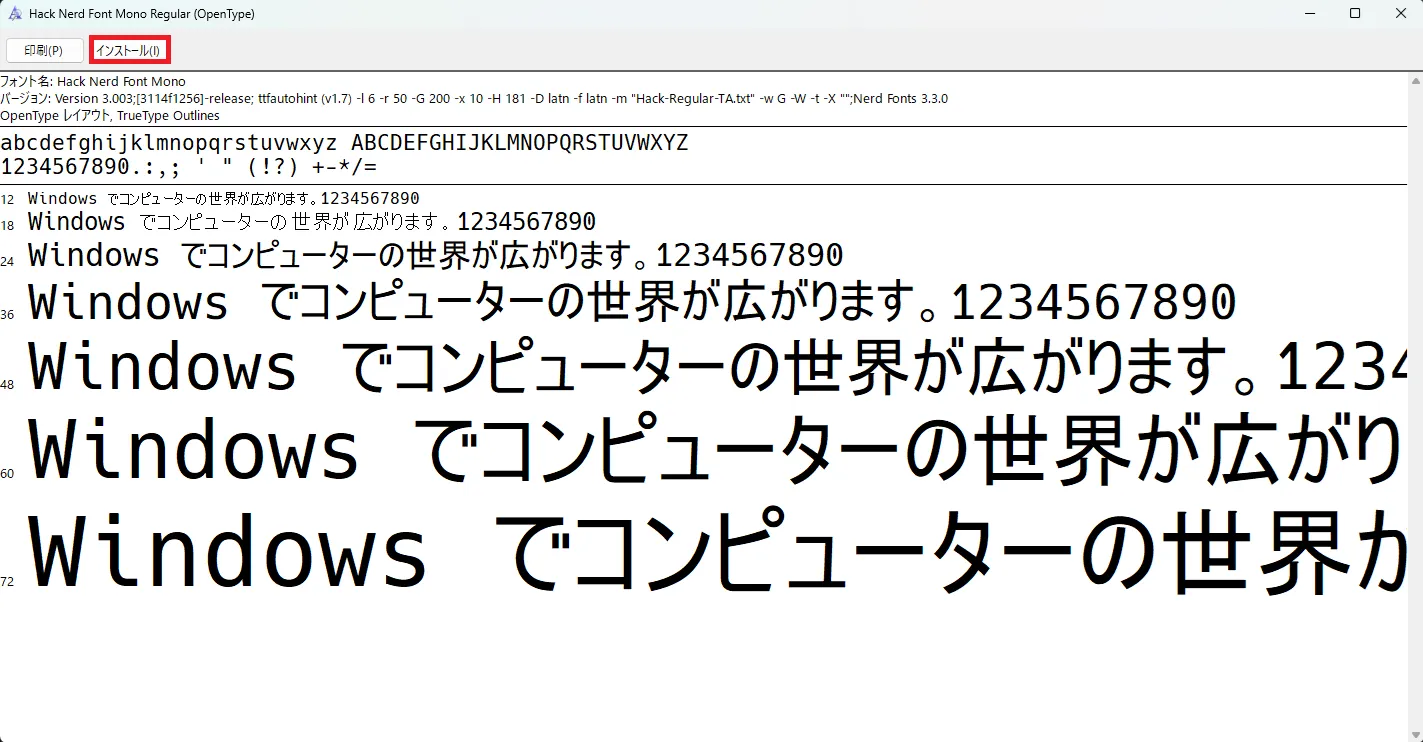
3. Windows Terminalの設定を変更する
-
ターミナルを開く -
設定をクリックする -
スタートアップで規定のプロファイルを先程インストールしたPowerShellに変更する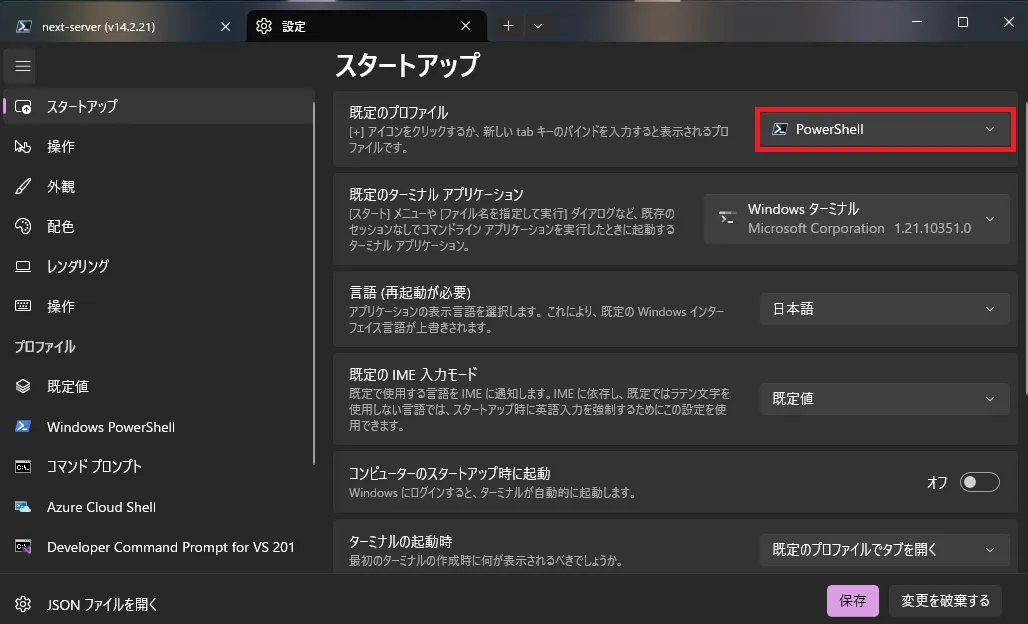
-
プロファイルで
PowerShellを選択し、下部の外観をクリックする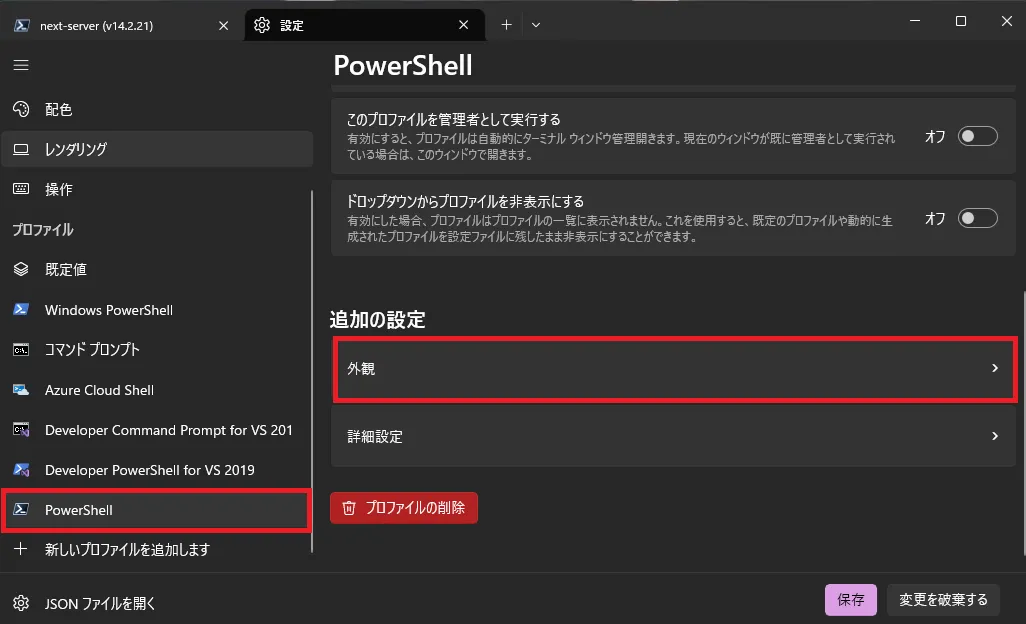
-
フォントフェイスを
Hack Nerd Font Monoに変更し保存をクリックする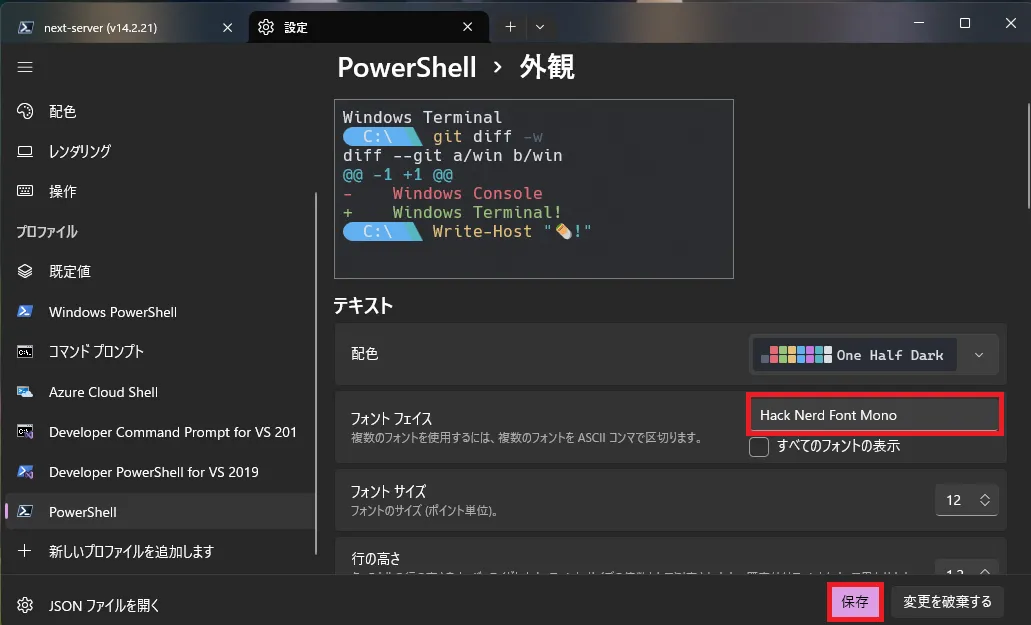
4. Oh My Poshをインストールする
- wingetを利用してOh My Poshをインストールする
winget install JanDeDobbeleer.OhMyPosh-
%UserProfile%\.config\powershellにuser_profile.ps1を作成する -
以下のスクリプトをコピペする
# set PowerShell to UTF-8[console]::InputEncoding = [console]::OutputEncoding = New-Object System.Text.UTF8Encoding
# Prompt$omp_config = Join-Path $PSScriptRoot ".\user.omp.json"oh-my-posh --init --shell pwsh --config $omp_config | Invoke-Expression-
%UserProfile%\.config\powershellにuser.omp.jsonを作成する -
以下のJSONをコピペする
{ "$schema": "https://raw.githubusercontent.com/JanDeDobbeleer/oh-my-posh/main/themes/schema.json", "blocks": [ { "type": "prompt", "alignment": "left", "segments": [ { "properties": { "cache_duration": "none" }, "leading_diamond": "\u256d\u2500\ue0b6", "template": " {{ .Name }} ", "foreground": "#ffffff", "background": "#0077c2", "type": "shell", "style": "diamond" }, { "properties": { "cache_duration": "none", "root_icon": "\uf292" }, "template": "<parentBackground>\ue0b0</> \uf0e7 ", "foreground": "#FFFB38", "background": "#ef5350", "type": "root", "style": "diamond" }, { "properties": { "cache_duration": "none", "enable_hyperlink": true, "style": "full" }, "template": " {{ .Path }} ", "foreground": "#E4E4E4", "powerline_symbol": "\ue0b0", "background": "#444444", "type": "path", "style": "powerline" }, { "properties": { "branch_icon": "\ue725 ", "cache_duration": "none", "fetch_status": true, "fetch_upstream_icon": true }, "template": " {{ .HEAD }} {{ if .Working.Changed }}{{ .Working.String }}{{ end }}{{ if and (.Working.Changed) (.Staging.Changed) }} |{{ end }}{{ if .Staging.Changed }}<#ef5350> \uf046 {{ .Staging.String }}</>{{ end }} ", "foreground": "#011627", "powerline_symbol": "\ue0b0", "background": "#FFFB38", "type": "git", "style": "powerline", "background_templates": ["{{ if or (.Working.Changed) (.Staging.Changed) }}#ffeb95{{ end }}", "{{ if and (gt .Ahead 0) (gt .Behind 0) }}#c5e478{{ end }}", "{{ if gt .Ahead 0 }}#C792EA{{ end }}", "{{ if gt .Behind 0 }}#C792EA{{ end }}"] } ] }, { "type": "prompt", "alignment": "right", "segments": [ { "properties": { "cache_duration": "none", "fetch_package_manager": true, "npm_icon": " <#cc3a3a>\ue5fa</> ", "yarn_icon": " <#348cba>\uf61a</>" }, "leading_diamond": " \ue0b6", "trailing_diamond": "\ue0b4", "template": "\ue718 {{ if .PackageManagerIcon }}{{ .PackageManagerIcon }} {{ end }}{{ .Full }}", "foreground": "#3C873A", "background": "#303030", "type": "node", "style": "diamond" }, { "properties": { "cache_duration": "none", "fetch_package_manager": true, "npm_icon": " <#cc3a3a>\ue5fa</> ", "yarn_icon": " <#348cba>\uf61a</>" }, "leading_diamond": " \ue0b6", "trailing_diamond": "\ue0b4", "template": "\ue235 {{ if .Error }}{{ .Error }}{{ else }}{{ if .Venv }}{{ .Venv }} {{ end }}{{ .Full }}{{ end }}", "foreground": "#100e23", "background": "#906cff", "type": "python", "style": "diamond" }, { "properties": { "cache_duration": "none" }, "leading_diamond": " \ue0b6", "trailing_diamond": "\ue0b4", "template": " {{ .CurrentDate | date .Format }} ", "foreground": "#ffffff", "background": "#40c4ff", "type": "time", "style": "diamond", "invert_powerline": true } ] }, { "type": "prompt", "alignment": "left", "segments": [ { "properties": { "cache_duration": "none" }, "template": "\u2570\u2500", "foreground": "#21c7c7", "type": "text", "style": "plain" }, { "properties": { "always_enabled": true, "cache_duration": "none" }, "template": "❯ ", "foreground": "#e0f8ff", "type": "exit", "style": "plain", "foreground_templates": ["{{ if gt .Code 0 }}#ef5350{{ end }}"] } ], "newline": true } ], "version": 3}- 以下のコマンドでPowerShellプロファイルを作成する
new-item -type file -path $profile -force- 以下のコマンドを入力し作成したプロファイルを編集します
notepad $PROFILE- 以下のコマンドをコピペする
. $env:USERPROFILE\.config\powershell\user_profile.ps1- Terminalを再起動しデザインが反映されていることを確認する

5. Terminal Iconsをインストールする
Terminal Iconsをインストールすることで不足しているフォルダまたはファイルのアイコンを追加することが出来ます。
- 以下のコマンドでTerminal Iconsをインストールする
Install-Module -Name Terminal-Icons -Repository PSGallery-
user_profile.ps1を編集する -
以下のコマンドを追記する
# set PowerShell to UTF-8[console]::InputEncoding = [console]::OutputEncoding = New-Object System.Text.UTF8Encoding
# Prompt$omp_config = Join-Path $PSScriptRoot ".\user.omp.json"oh-my-posh --init --shell pwsh --config $omp_config | Invoke-Expression
# Terminal IconsImport-Module -Name Terminal-Icons- Terminalを再起動し、
lsコマンドを入力後、アイコンが適用されていることを確認する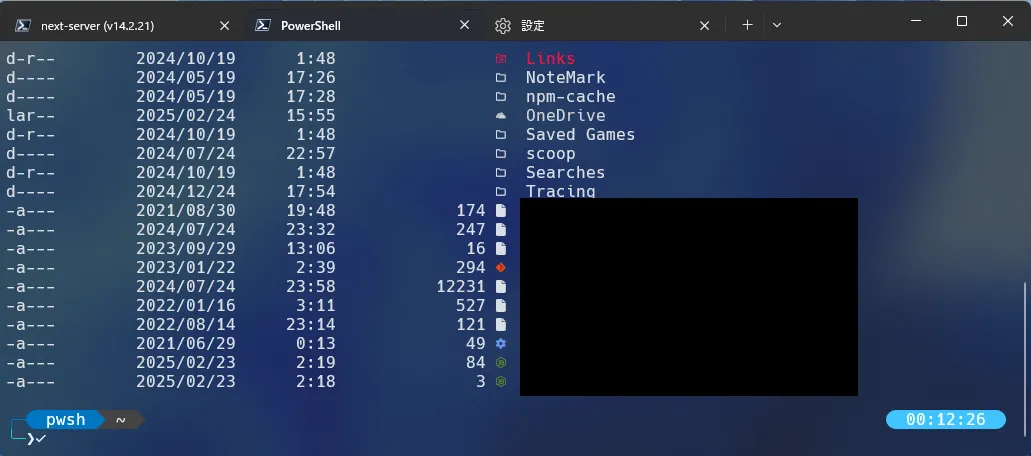
参考にさせていただいたサイト・動画
Windows ターミナルのカスタム プロンプトのセットアップ
このチュートリアルでは、Windows ターミナルで、Oh My Posh と Terminal-Icons をセットアップする方法について説明します。